Retrospective tutorial
Creating Result Snapshots
Objectives
-
Create a result snapshot
-
Open a saved result snapshot
-
Get to know the result snapshot tab
Before we begin
A snapshot is an immutable copy of collected result data. Retrospective allows you to create such snapshots and store them. The snapshot remains unchanged throughout its lifetime and can be opened and used later.
Important: In order to be able to create a snapshot, the result data must have been collected (fetched) while the disk storage option was enabled (see Result Options page within the preferences dialog). Also, it is only possible to create snapshots when a search is completed or the monitoring process is stopped.
Step 1
Create a profile with the desired log files and/or containers.
Step 2
Search or monitor your profile.
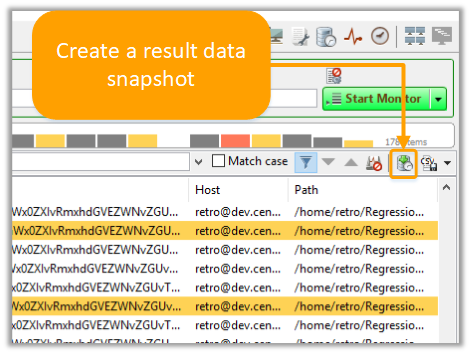
Step 3
Click on the “Create result data snapshot” icon.
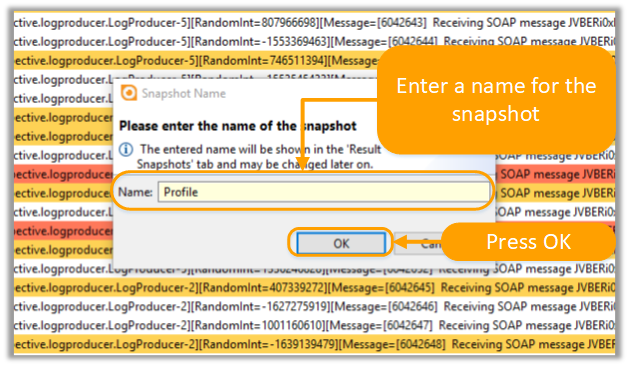
Step 4
Enter a name for the snapshot.
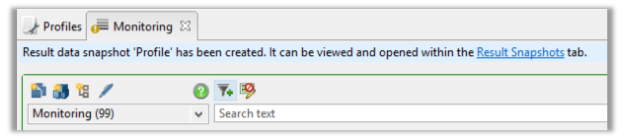
After clicking on the OK button, the message “Result data snapshot ‘Profile’ has been created. It can be viewed and opened within the Results Snapshots tab.” will display.
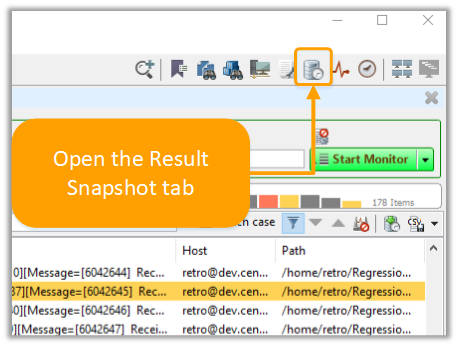
Step 5
Open the Results Snapshot tab by:
-
Selecting View --> Result Snapshots
-
Clicking on the Result Snapshots icon
-
Using the key combination [Ctrl] + [N]
Step 6
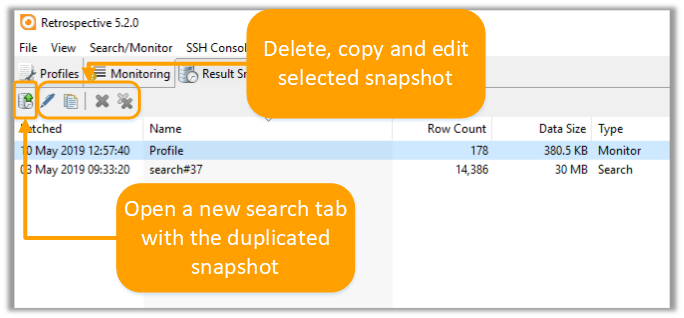
In the Results Snapshot tab, you can open your stored snapshot by clicking on the “Open selected snapshot” icon. The snapshot is then presented in a new search tab.
The Results Snapshot tab also offers you the following options:
-
Delete selected/ all snapshots
-
Copy selected snapshot
-
Edit the name of the selected snapshot
Note:
It’s important to carefully manage your snapshots because they may occupy a huge amount of disk space when created and preserved carelessly. Try to create snapshots only if there’s a considerable chance you’ll need them in the future without being able to collect the same data at given time again. Make sure to remove outdated snapshots.