Retrospective tutorial
Sudo
This tutorial covers the following topics:
-
Selecting either sudo or sudo su to change your identity on a host.
-
Using the options related to identity change (using a password if required / initial login).
-
Verifying your configuration in the test output on the host manager.
Sometimes the log files that you want to search/monitor require the security privileges of a different user (normally the super user - root) than the one you have configured in the authentication section of the host manager tab. You can configure Retrospective to change your identity on a host and execute all shell commands on behalf of the configured target user. Retrospective offers the following approaches for the user identity change:
-
sudo: Retrospective uses sudo to execute shell scripts as the target user
-
sudo su: Retrospective uses sudo to become super user and then uses su to execute all shell scripts as the target user.
Both these approaches additionally:
-
support an "initial login" option to replace the shell environment with the target user's environment.
-
provide the option to use a password OR no password, to match your configuration in /etc/sudoers.
Step 1
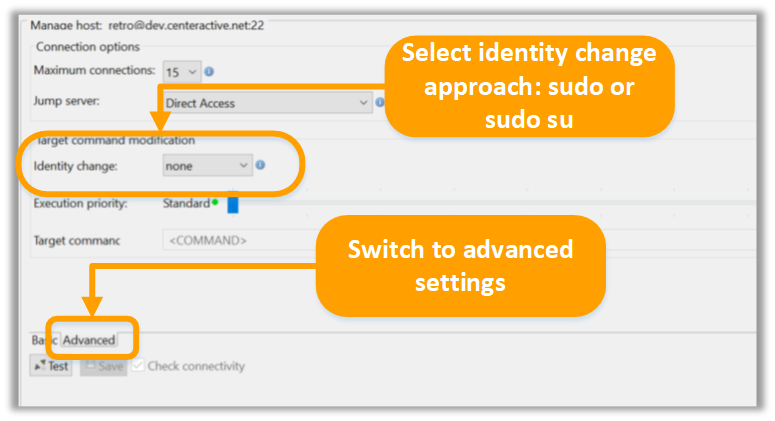
Open the host manager tab, select a host from the host list and then select an approach for the identity change.
Step 2
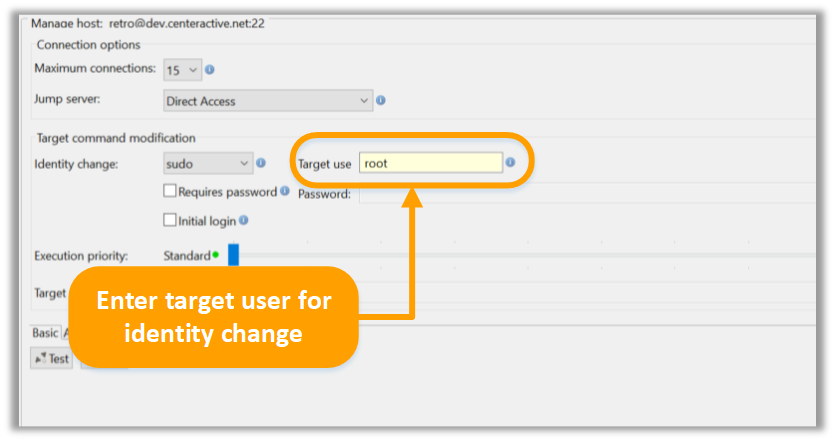
Define the target user for the identity change. Default is “root”, but you can enter another user if you want to.
Step 3
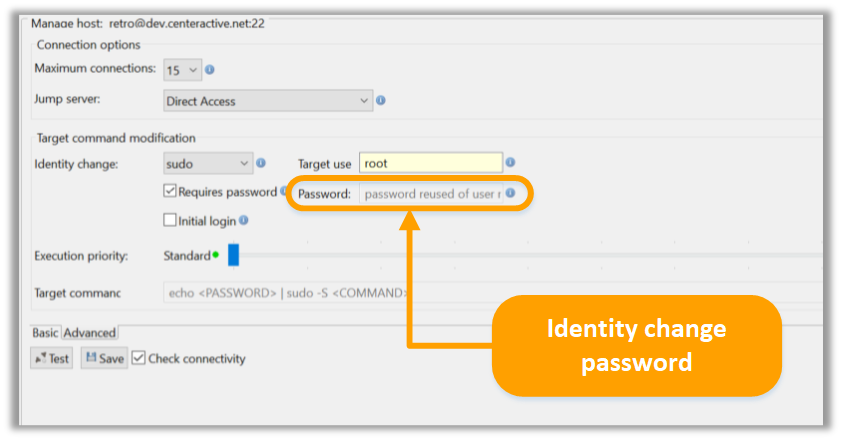
If sudo requires a password, check the “Requires password” option.
Step 4
Select the initial login option if you want to replace the shell environment with the target user’s environment.

Step 5
If you select "Requires password" then (depending on the Authentication method) Retrospective will either reuse the password defined in the Authentication section or request you to enter a password. In our example the password defined in the Authentication section is reused.
Step 6
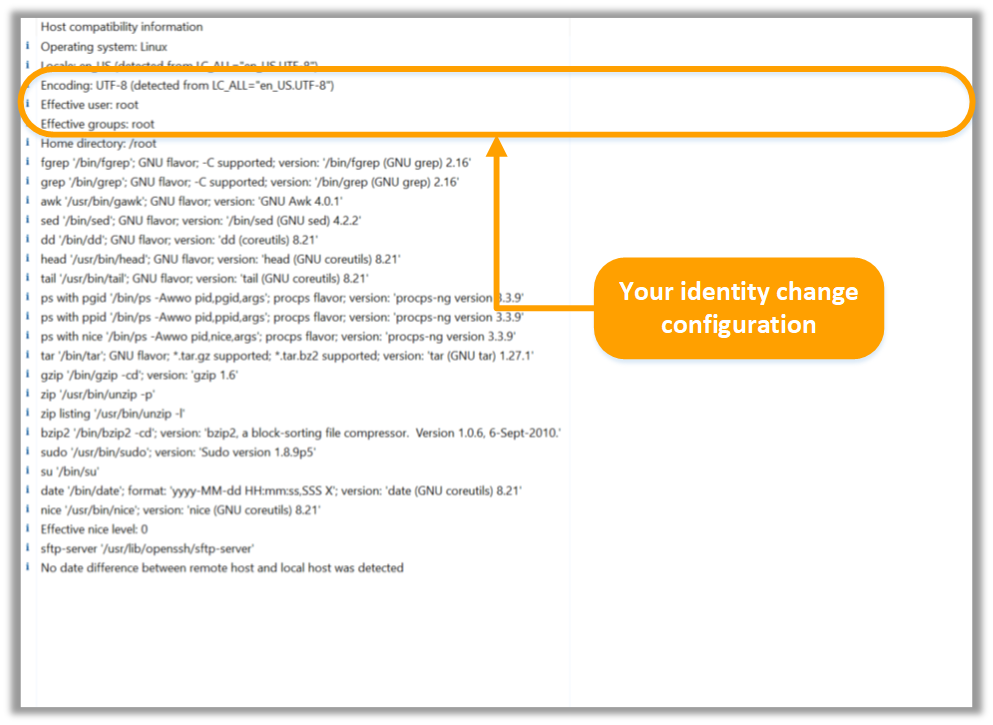
Test / save your configuration. The test output should reflect your identity change configuration.